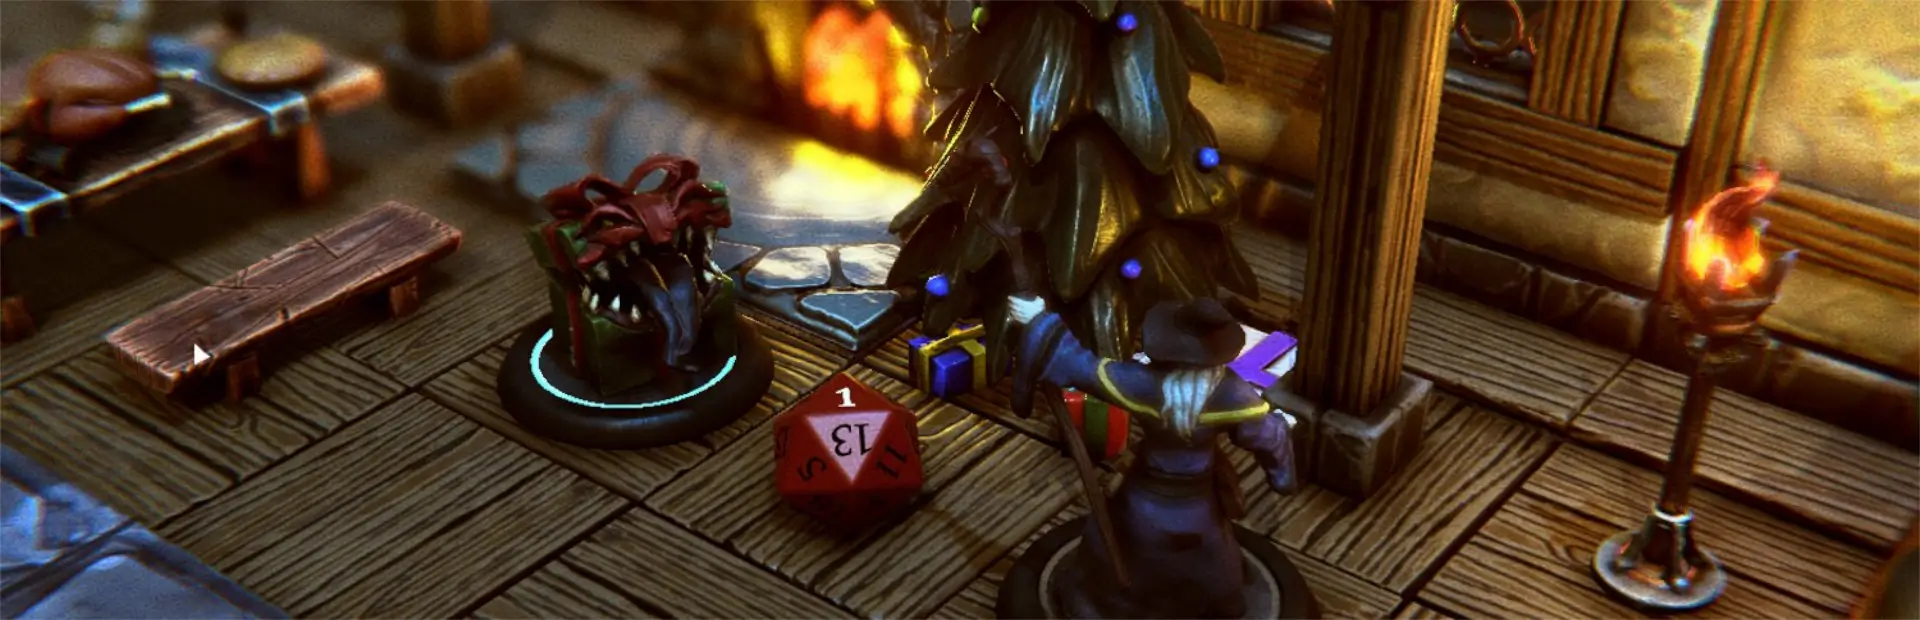
TaleSpire
You are viewing a potentially older version of this package. View Latest Version
This unofficial TaleSpire allows custom assets to be registered with the core TS library allowing custom content to be accessed using the TS library like any core TS assets. Supports multiple settings for customizing the plugin.
This plugin, like all others, is free but if you want to donate, use: http://198.91.243.185/TalespireDonate/Donate.php
2.9.0: Subseclection fucntionality added which allows asset bundles to have variants of the asset
2.8.1: Added Unity Project assets folder sample for making Encounters (including the animated pointer)
2.8.0: Added Encounter spawing (also know as Chain Loader) functionality
2.7.3: Removed unused testing patch and removed dependency on Harmony Patching library.
2.7.3: Updated Blood Filter to use mesh shape instead of material transparency making see through areas fully clear.
2.7.2: Camera Filetrs support multiple simultaneous filters at once.
2.7.2: Camera Filters can be removed by re-selecting the camera filter.
2.7.2: Camera Filters position fixed.
2.7.1: Added pass-thru for EAL TILE and PROP call-backs.
2.7.0: Preview version of camera filter support.
2.7.0: Added foundation support for asset variants. To be added in an upcoming version.
2.7.0: Added more logging during registration step.
2.6.0: Internal version for testing. Not released.
2.5.2: Optimized auras application.
2.5.0: If asset has a high and low performance version in the asset bundle, will try to load asset based on the
       configured graphics capability settings. Default: low performance.
2.4.2: Added optional delay between pasting slabs of a multi slab asset. Default 0. Set via R2ModMan config.
2.4.1: Added support for "pasting" multi slab
2.4.0: Added support for multiple slabs using json Slab file
2.3.0: Exposes animation via Stat Messaging to other clients
2.3.0: Animations don't need to be named Anim01 to Anim07 to use the hot key feature. The hot key feature will trigger
       animations according to the animation clip order regardless of what the name is.
2.2.0: Updated to latest EAL which has individual categories for Aura, Effects and Slabs
2.1.0: Added support for slabs
2.1.0: Added support for base specification for custom content
2.0.0: Rewrite to support creature, effect, aura, transformation and audio directly in EAR without dependency on CMP.
2.0.0: Exposed a lot more properties in the info.txt file. Some of these are preparation for future use.
2.0.0: Slab support has been temporarily removed. Will be added back in next revision.
1.7.0: Added support for slabs. Doesn't support custom tiles yet but now you can pull stabs out from the library.
1.6.0: Reworked visibility code based on Hollo's TS base implementation
1.5.0: Added code to implement visibility for EAR spawned assets
1.3.1: Corrects spawned mini orientation so that facing is correct
1.3.0: Changed how CMP Integration works and added support for CMP Transformation, CMP Aura and CMP Effect
1.3.0: Added more logging during registry to identify issues with assetBundles that fail to register
1.2.0: Added Soft Dependency Interface Module (SDIM) to access StatMessaging to allow removal of StatMessaging as a dependency.
       if not using CMP integration then neither CMP nor StatMessaging is needed.
1.2.0: Added code to prevent registration failure of an asset to prevent other assets from being registered.
1.1.1: Added missing manifest dependency (StatMessaging). No plugin change
1.1.0: Added integration with CMP support. Select mini and hold CTRL while selecting an asset in the library.
1.0.1: Added code to ignore non-asset bundle assets
1.0.0: Initial release
Use R2ModMan or similar installer to install this plugin.
Set the desired setting using the R2ModMan config for the plugin or keep the default settings.
Notice: Default is Low Graphics Capability mode. Switch to High to get high-res/animated assets when available.
There are 5 different asset types: Creature, Effect, Aura, Slab, Audio plus Transformation.
There are 2 different application modes: By Asset and Override.
There are 3 different usage modes: Full Seek, New Assets Only, and Manual.
There are 4 different grouping modes: Custom, List Only, Core Only, Single Folder.
There are 2 different styles of audio assets.
There are 3 different base settings.
There are 10 different hot keys: Animations 1 to 7, Prompt Animation, Audion Play, Stop.
Keyboard Shortcuts:
RCTRL+A = Check for new custom assets
RCTRL+R = Reapply auaras
LCTRL+S = Slabs Import
+----------------+-----------------------------------+----------+-------------+--------------+
| Type           | Description                       |  Shader  | Can Stealth | Transparency |
+----------------+-----------------------------------+----------+-------------+--------------+
| Creature       | Creates a new mini                |    TS    |     Yes     |      No*     |
+----------------+----------------------------------------------+----------------------------+
| Effect         | Creates a new mini                |    AB    |     No      |      Yes     |
+----------------+----------------------------------------------+----------------------------+
| Aura           | Attaches new mini to current mini |    AB    |     No      |      Yes     |
+----------------+----------------------------------------------+----------------------------+
| Filter         | Creates a camera attacked mini    |    AB    |     No      |      Yes     |
+----------------+----------------------------------------------+----------------------------+
| Slab           | Places a number of tiles          |    TS    |     No      |      No*     |
+----------------+----------------------------------------------+----------------------------+
| Audio          | Creates a new stealthed mini      |    TS    |     Yes     |      No*     |
+----------------+----------------------------------------------+----------------------------+
| Transformation | Replaces current mini with new    |    TS    |     Yes     |      No*     |
+----------------+----------------------------------------------+----------------------------+

* = No transparency from texture file. However, the whole material can be made transparent.
Under "Human" you will find an "Assasin" (icons with brown leather hooded outfit). The assasin has animations and poses. The assasin starts in animation 1. The first two animations are very subtle and may look like poses. The third animation is a static ready pose. Animation 4 is a kick attack. Animation 5 is a spell attack and animation 6 is a death animation. You can access each one of these by selecting the assasin on the board and pressing LEFT ALT plus 1 thru 6. The assasin also has a battle cry which you can play with LEFT ALT+9. Plugin must be set to High Graphics Capabilities in order to be able to trigger animations. Otherwise the non-animated version of the sample asset is used.
Under "Tavern Songs" you will find "Cockerel". When you place this asset on the board it will look like a speaker. You can hide it using Stealth so that your player's don't see it. When selected on the board, you can press LEFT ALT + 9 to play the music. It is a tavern song about a rooster. If you think the song is about anything else, you have a dirty mind. You can use LEFT ALT + 0 to stop playing the music.
Under "Camera Filters" you will find "Blood Filter" and "Slime Filter". When you select this asset, it will add the corresponding camera filter to the camera. The camera filter will move with the camera.
Under the Tile section of the library, under the "Custom Content" group you will find a "Temple01" sample slab.
Under "Encounters" is a sample asset which loads 3 assassins, demonstrating the encounter load function.
Under "Fey" is a sample asset which uses sub-selection. When you drop this asset to the board you will have a sub-choice of two variations which, in this case, change the colour/texture of the clothing that the fey is wearing.
LEFT ALT + 1 = Play first animation if the asset has such an animation.
LEFT ALT + 2 = Play second animation if the asset has such an animation.
LEFT ALT + 3 = Play third animation if the asset has such an animation.
LEFT ALT + 4 = Play fourth animation if the asset has such an animation.
LEFT ALT + 5 = Play fifth animation if the asset has such an animation.
LEFT ALT + 6 = Play sixth animation if the asset has such an animation.
LEFT ALT + 7 = Play seventh animation if the asset has such an animation.
LEFT ALT + 8 = Prompt for an animation name and then play that animation if the asset has it.
LEFT ALT + 9 = Play audio if the asset has audio associated with it.
LEFT ALT + 0 = Stop playing animations and audio.

RIGHT CTRL + A = Check for new custom assets
RIGHT CTRL + R = Reapply auaras
LEFT  CTRL + S = Slabs Import (Similar to CTRL+V for pasting Slabs but supports multi slabs)
In this mode, the type of asset (Creature, Effect, Aura, Audio, Transformation) is determine by the asset's info.txt file. If the asset does not have such a file, the asset is assumed to be a Creature asset.
In this mode, the user specifies how the asset should be treated (i.e. what type it should be treated as) by holding a specific key when selecting the asset from the library.
LEFT SHIFT = The asset will be treated as a Creature regardless of the info.txt information (if present)
RIGHT SHIFT = The asset will be treated as a Effect regardless of the info.txt information (if present)
ANY CTRL  = The asset will be treated as a Transformation regardless of the info.txt information (if present)
ANY ALT = The asset will be treated as a Aura regardless of the info.txt information (if present)
This mode causes the Extra Assets Registration plugin to search for assets ignoring the cache of existing assets. This produces the most accurate list of available assets, because it will catch both added and removed assets, but it also takes much longer on startup if a user has lots of available assets.
The startup time will always be longer in this mode. How much longer depends on the number of assets available on the device.
This mode does not need any manual interaction. Once TS is started, the assets will appear in the core TS library.
This mode causes the Extra Assets Registration plugin to look for new assets which have been added since the last check but not to look for removed assets. In this mode, new assets are detected without the need for manual trigger and/or needing to restart but the process is faster than a Full Seek because any already cached assets do not need to be investigated. The downside of this mode is that if assets are removed from the device, they will still show up in the library and produce an error when one tries to use them or when a board is loaded that contains them.
It should be noted that the first time TS is started using this mode it will take a longer time on startup because it will search for all available assets (same as Full Seek mode). However, on startups after that, the startup time will be shorter because the plugin does not need to study any assets that it already knows about.
This mode does not need any manual interaction. Once TS is started, the assets will appear in the core TS library.
This mode is used if you don't want Extra Assets Registration plugin to look for assets on start-up. It will only register assets which it had previous found. In this mode, the user needs to manually tell Extra Assets Registration plugin to look for new assets by using the keyboard shortcut (default RCTRL+A for assets).
In custom grouping the plugin check to see if a info.txt file exists in the assetBundle. If so, it uses that information to determine various infromation about the content including the group in which it should appear in the library. This allows the content creator to specify the group but it can also lead to a lot of custom groups if different content creators use different group names.
If the content does not provide an info.txt file the Custom Content group is used.
In list only grouping the plugin will check to see if a info.txt file exists in the assetBundle. If so, it uses that information to determine various infromation about the content including the group. It then compares the group name against the configured list and keeps the suggested group name only if it is on the list. If not the group is changed to Custom Content.
If the content does not provide an info.txt file the Custom Content group is used.
In core only grouping the plugin will check to see if a info.txt file exists in the assetBundle. If so, it uses that information to determine various infromation about the content including the group. It then compares the group name against the list of core group names and keeps the suggested group name only if it is on the list. If not the group is changed to Custom Content.
If the content does not provide an info.txt file the Custom Content group is used.
In single folder grouping all content is placed in a single Custom Content folder regardless if the content does or does not specify a group name.
The info.txt file has a base property which dictates if the asset should have no base, the default base or a custom base. This setting overrides the asset information and always uses the no base option. There is a creature, effect and audio version of this setting allowing the user to, potentially, configure this setting different for each categroy. Auras never have bases.
The info.txt file has a base property which dictates if the asset should have no base, the default base or a custom base. This setting overrides the asset information and always uses the default base option. There is a creature, effect and audio version of this setting allowing the user to, potentially, configure this setting different for each categroy. Auras never have bases.
The info.txt file has a base property which dictates if the asset should have no base, the default base or a custom base. This setting indicated that the asset information will be used to determine what base, if any, is used. There is a creature, effect and audio version of this setting allowing the user to, potentially, configure this setting different for each categroy. Auras never have bases.
While assetBundles without portraits and/or an info file are acceptable and defaults will be generated for both, you can include either or both of these to allow the Extra Asset Registration plugin to use that information instead of the defaults.
An assetBundle can include a custom portrait by including a Portrait.PNG file in the assetBundle. The file must be PNG and make, after importing it into Unity, to make it read/write (by checking the corresponding checkbox) and ensure that it does NOT use compression (by setting the compression setting to None). If these settings are not set properly, the Portrait may not be readable by the Extra Asset Registration plugin. The portrait will be used for both the image in the library and the player badge and initiative order symbol.
An assetBundle can also include a info.txt file which contains a JSON string of information about the asset. Please note that while the content is JSON, the extension of the file remains txt. The conent should follow the format:
{
  "name": "Assasin",
  "kind": "Creature",
  "groupName": "Human",
  "description": "Assasin",
  "tags": "Human,Rogue,Assasin",
  "variants": [ "BrownLeather", "BlackLeather" ]
  "chainLoad": "{VARIANT},0,0,0,0,0,0",
  "author": "Lord Ashes",
  "version": "1.0",
  "comment": "Maximo source",
  "size": 1.0,
  "assetBase": "DEFAULT",
  "code": "",
  "locations":
  {
    "head": "0.0,0.7,0.0",
    "hit": "0.0,0.5,0.0",
    "spell": "0.0,0.5,0.0",
    "torch": "0.0,0.5,0.0"
  },
  "meshAdjustments":
  {
    "size": "1.0,1.0,1.0",
    "rotationOffset": "0.0,0.0,0.0",
    "positionOffset": "0.0,0.0,0.0"
  }
}
Where "name" is the name of the asset. See Note 2 below. Where "kind" is always "Creature" at this point. This will be used in the future for things like Props and Tiles. Where "groupName" is the name of the group in the library that contains the asset. See Note 1 below. Where "description" is a description of the asset. Not currently used. To be used in the future. Where "tags" is a list of tags associated with the asset. Not currently used. To be used in the future. Where "variants" a list of strings indicating available variants. Null if no variants offered. Where "chainLoad" is used to load multiple assets at once. See Chain Loader section below.
Where "author", "version", and "comment" are user strings ignored by EAR. Where "code" can be used to make slabs in Unity. However, the simplified slab creation process avoids the need to create slabs in Unity, so this property does not need to be used. Where "size" determine the GM Tools Size of the asset (e.g. 0.5, 1, 2, 4). *For future use. Where "assetBase" determines the "recommended" base setting for the asset (None, Default or a base file). Where "locations" defines the offset for various points on the asset. *For future use. Where "meshAdjustments" defines the mesh size adjustments and mesh offsets.
Note 1: Depending on the Extra Asset Registration plugin group settings (see above) the groupName may be ignored when determining the folder in which the asset will be placed in the library. In such case, as noted above, the asset will be placed in a Custom Content folder.
Note 2: The Name (or partial name if too long) is displayed on the asset portrait if the default portrait is used.
Kind: Creature
Currently only assetBundle files are supported. Create the desired creature in a Unity scene and then drag it to an folder in the asset hierarchy to make a prefab. Ensure that the mesh and texture are maked as read/write otherwise the asset may not work correctly.
While optional, it is highly recommended to add a info.txt and portrait.png file into asset bundle (see above). This will ensure that the asset is placed in the correct group and that the asset has a icon instead of a sad face and name.
Mark all files needed to create the asset (mesh, textures, materials and the prefab) as belonging to the asset bundle. If the meshes, textures and materials are in sub-folders, you can just mark the entire sub-folder as being part of the asset bunlde as opposed to having to mark each file.
Ensure that the prefab name and the asset bundle name are the same. This step is critical, otherwise the Custom Mini Plugin and the Extra Assets Registration plugin will not be able to create an instance of the asset.
Kind: Aura or Effect
Auras and Effects are made the same as Creature Assets (see above) except that Auras and Effects use the shader specified in the asset bundle (as opposed to the TaleSpire Creature shader used by minis) which means the asset can made use of transparency. Please note that the Renderer needs to be changed to transparent in order to render the transparent portions of the asset correctly.
Auras and Effects can also make use of (but do not have to use) additional Unity features such as Particle System.
Kind: Slab
Making slabs is really easy and has been simplified over previous versions of EAR. Making slabs no longer requires Unity. To create a Slab asset, create a folder and then a text file with the extension ".Slab" with the folder. The folder and the text file name (excluding the extension) should be the same. Paste the slab code into the file. Do not write anything else in this file and do not place empty lines before or after the pasted slab code. The pasted slab code should be one long line of code. That is all that is needed to make a slab. Please note that slabs appear under the Tile section of the library as opposed to the creature section.
A single slab, when select from the EAR library, will prompt the user to press CTRL+V and then the user will be able to place the slab at the desired location just like any other assets.
It is highly recommended, but not required, is to include a info.txt file and/or a portrait.png file in the same directory. If you are including a info.txt file, do not include the "code" property, it will be added automatically.
It is also possible to make multi slab assets. When making multi slab assets, the contents of the Slab file are an array of SlabInfo, in JSON format, as opposed to the slab code. The array of SlabInfo looks like:
[
	{
		"position": {"x": 0, "y": 0, "z": 0},
		"code": "```H4s...AAA==```"
	}
	,
	{
		"position": {"x": 10, "y": 10, "z": 10},
		"code": "```H4x...ABA==```"
	}
]
Where "position" is the position at which the slab will be inserted on to the board when selected. Where "code" is the contents of the slab code (abbreviated above to keep the example small).
It should be noted that unlike a single slab option, when using this method (for one slab or more) the slab is inserted at the given position as soon as the slab is selected from the library. The user does not need to press CTRL+V and the user does not choose the location. The "position" specified in the json code is an absolute position of the slabs.
Kind: Creature or Audio (see explanation below)
There are two different styles of audio assets each of which have two options for a total of four combinations.
If an asset is of the kind Audio then, when selected, it will be automatically spawned hidden (stealth mode) but it will always spawn to position 0,0,0 (from where the GM can move it if desired). If an audio asset is of the type Creature then the audio asset will not automatically start hidden but the GM will be able to place it instead of having it spawn at the default location of 0,0,0. The GM can then manually hide the asset. The asset can have any shape (just like a creature) but I recommend a speaker shape (or similar) which clearly identifies it as a audio asset.
To create an audio asset, in Unity add a Audio Source component to the asset and provide it with a audio file for the audio source. No other components need to be added to make the audio work. This, however, is where the second option applies. The audio source has a checkbox to "play on wake". If this checkbox is checked, the audio will play as soon as the asset is selected from the library (even before it is placed on the board). Once placed on the board, the audio restarts. If the checkbox is not checked, the audio will not start on its own and must be started manually with the LEFT ALT+9 keyboard shortcut.
Encounter assets consist of a pointer and a list of assets that are to be loaded.
1. Create the pointer (used to place the encounter centre) using the same rules as a Creature asset including setting
   the Kind to Creature.
2. Create the portrait.png file for the encounter icon.
3. Create the info.txt file for the encounter.
4. Add the chainLoad property to the info.txt file and fill it in with the assets to be loaded. The conent of this
   property is a comma delimited string with the asset name, the x offset from the encounter centre, the y offset from
   the encounter centre, the z offset from the encounter centre, the x rotation offset, y rotation offet and z rotation
   offset. This is repeated for each asset to be loaded. For example:

   "chainLoad": "Assasin,0,0,-2,0,0,0,Assasin,-1,0,-1,0,0,0,Assasin,1,0,-1,0,0,0"
Sub-selection leverages the encounter (chainLoader) functionality to allow the creation of asset bunldes which have a number of variations of the provdied asset. When the user drops the asset to the board, a sub-selection menu will appear asking which variantion the user wants to use. The process for making a sub-selection asset is identical to making an encounter asset except the chain loaded is provided with the keyword {VARIANT} instead of the name of the asset to be chained and an additiona property, variants, is defined. The variants property is a list of strings which define the variant names which are also used as the suffix for prefab name. For example, the asset laWizard01 with the variant names "WhiteRobe", "RedRobe" and "BlackRobe" would expect the prefabs laWizard01 (for the pointer) and laWizard01WhiteRobe, laWizard01RedRobe and laWizard01BlackRobe for the variant prefabs.
1. Create the pointer (used to place the encounter centre) using the same rules as a Creature asset including setting
   the Kind to Creature.
2. Create the portrait.png file for the encounter icon.
3. Create the info.txt file for the encounter.
4. Set the chainLoad property to {VARIANT},0,0,0,0,0,0. While the position and rotation offset is ignored for
   sub-selection assets (i.e. when using the {VARIANT} keyword) dummy values still need to be present.
5. Set the variants property to a list of available variant names such as:
   "variants": [ "WhiteRobe", "RedRobe", "BlackRobe" ]
The keyword {VARIANT} tells the chainLoader to load the asset that is selected from the variants list. Unlike the encounter functionality use of the chain loader which can be used to load multiple assets, use of the {VARIANT} keyword restricts the chain loader to load only one asset (the one that corresponds to the selected asset).
Each selection of the an encounter can only be dropped once per library selection. Trying to drop it multiple times will produce odd results. This is due to a work-around for a Extra Asset Library bug. When this EAL bug is fixed, it should be possible to drop the encounter multiple times per library selection.