
Valheim
You are viewing a potentially older version of this package. View Latest Version
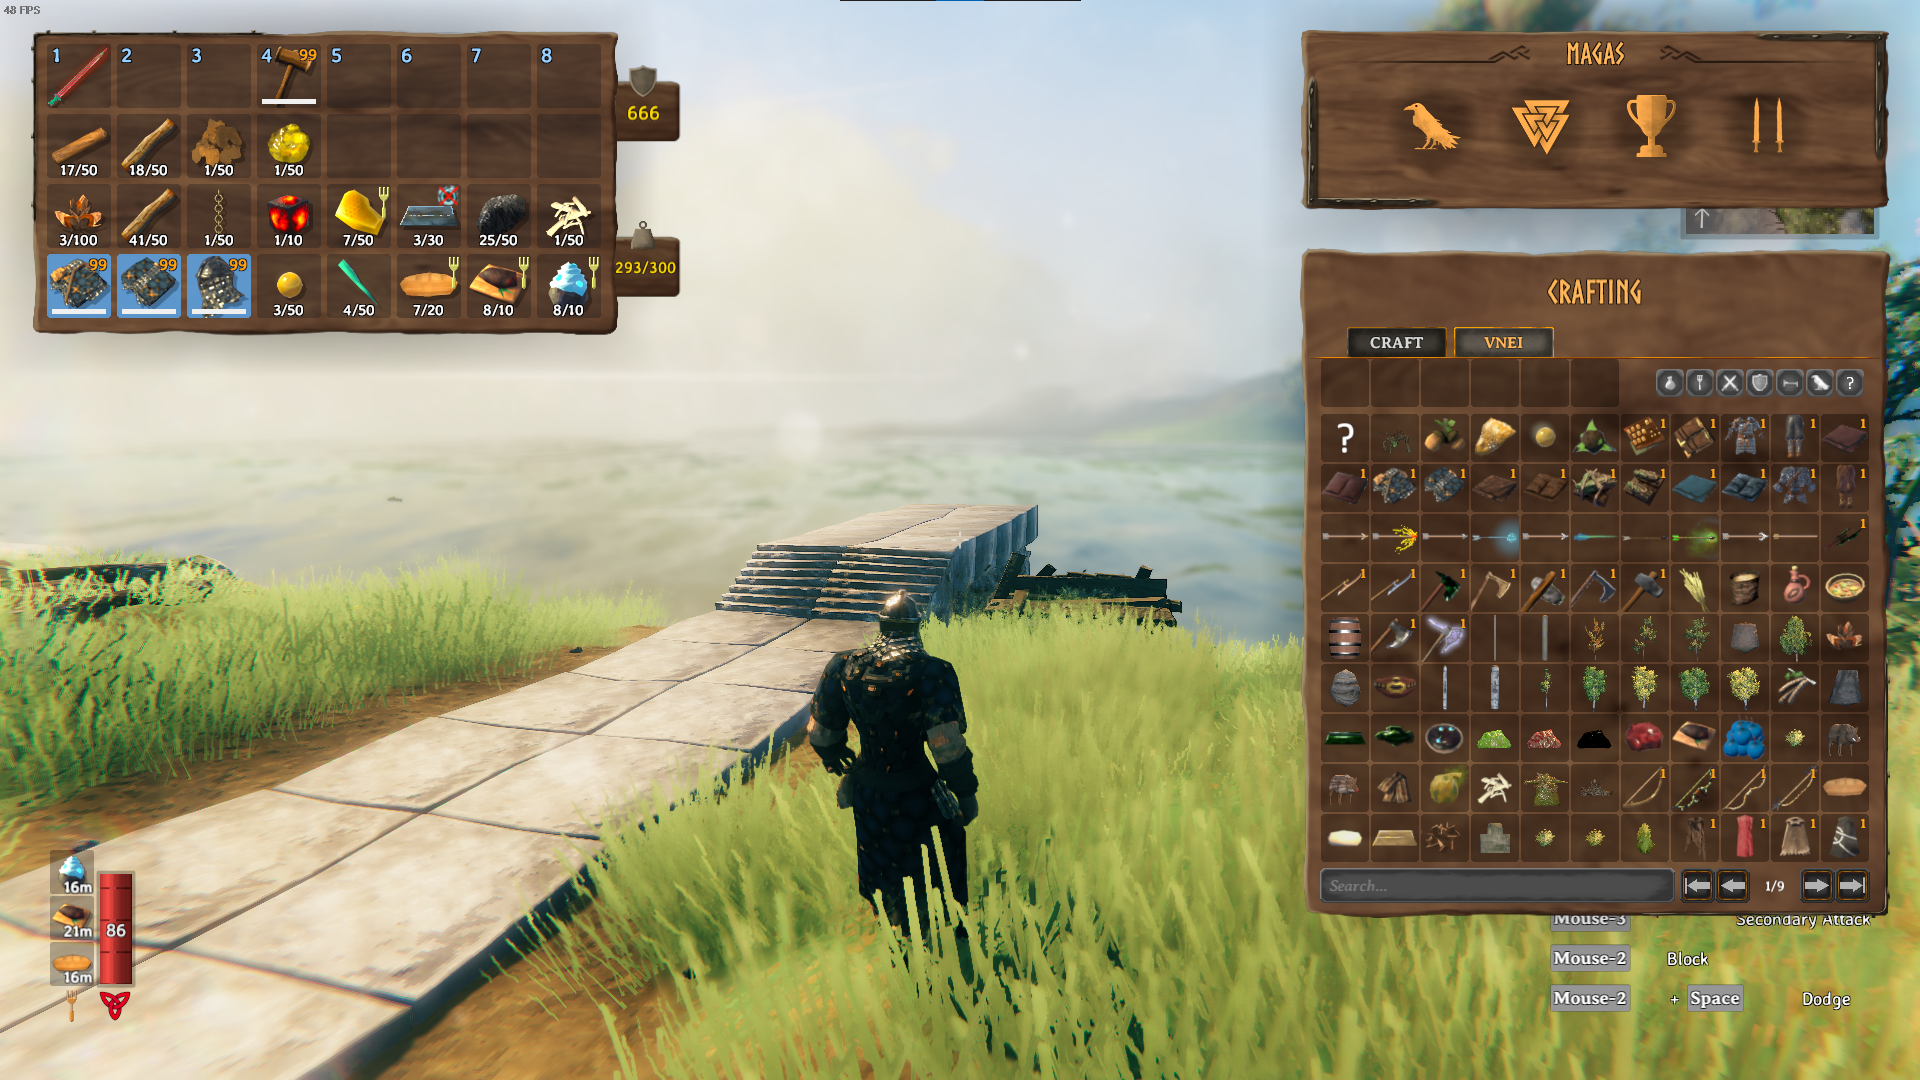
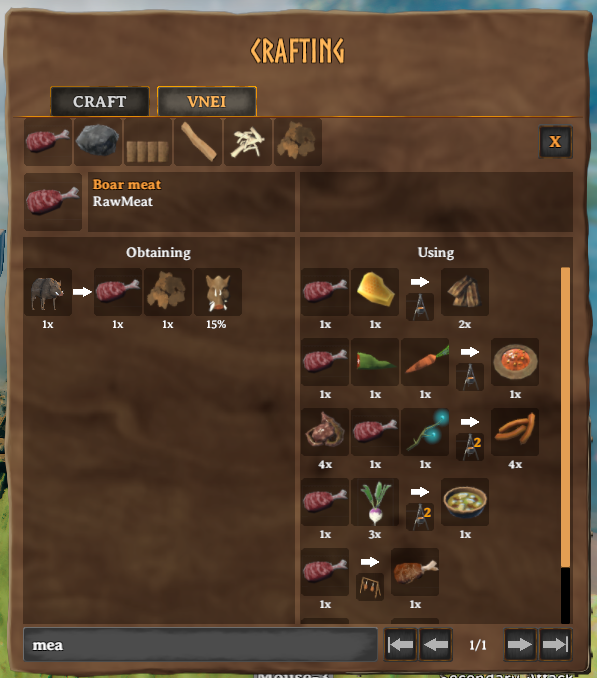
VNEI shows all items and recipes from the vanilla game and other mods inside an ingame GUI for easy access.
This mod requires BepInEx and Jötunn.
Extract the content of VNEI into the BepInEx/plugins folder.
This is a client side mod and not everyone has to use it if you are playing in multiplayer. If items or recipes from other mods are missing, please contact me.
The config file is generated at BepInEx/config/com.maxsch.valheim.vnei.cfg after the first launch, see there for detailed information.
BepInEx must be setup at manual or with r2modman/Thunderstore Mod Manager. Jötunn must be installed. Everything else is setup to be as automatic as possible, no need to copy any files or folders.
Note the master branch will always use a stable Jötunn version while others may use a directly compiled one.
Create a file called Environment.props inside the project root.
Copy the example and change the Valheim install path to your location.
If you use r2modman/Tunderstore Mod Manager you can set the path too, but this is optional.
<?xml version="1.0" encoding="utf-8"?>
<Project ToolsVersion="Current" xmlns="http://schemas.microsoft.com/developer/msbuild/2003">
    <PropertyGroup>
        <!-- Needs to be your path to the base Valheim folder -->
        <VALHEIM_INSTALL>E:\Programme\Steam\steamapps\common\Valheim</VALHEIM_INSTALL>
        <!-- Optional, needs to be the path to a r2modmanPlus profile folder -->
        <R2MODMAN_INSTALL>C:\Users\[user]\AppData\Roaming\r2modmanPlus-local\Valheim\profiles\Develop</R2MODMAN_INSTALL>
        <USE_R2MODMAN_AS_DEPLOY_FOLDER>false</USE_R2MODMAN_AS_DEPLOY_FOLDER>
    </PropertyGroup>
</Project>
This project requires the publicized Valheim dlls present at VALHEIM_INSTALL\valheim_Data\Managed\publicized_assemblies\assembly_[assembly]_publicized.dll.
Use any publicizer, see here for example: https://github.com/CabbageCrow/AssemblyPublicizer
If the paths are set correctly, all assemblies are loaded and the project can be build.
Now you can run deploy.sh, this will copy the mod to your BepInEx plugin folder as you setup in Environment.props.
If you want to rebuild the asset bundle, open the Unity project.
Because VNEI.dll, Jotunn.dll and dependencies must be present inside Unity, deploy.sh had to be ran at least once.
Now you can run Assets/Build AssetBundles at the toolbar, this copies the asset bundle back to the C# project.
Other mods can use events to include custom recipes that can't be indexed.
VNEI.dll needs to be referenced inside the C# project by either copying it to your mod or set the path to your Valheim mod folder.
When coping it, make sure to also have VNEI.xml alongside for documentation.
Please don't inlcude VNEI.dll in your final mod when publishing to avoid multiple versions, but feel free to upload it to a git repository of course.
Inside your .csproj:
<Reference Include="VNEI">
    <HintPath>...Path.../VNEI.dll</HintPath>
</Reference>
If you use VNEI as a soft dependency, it throws an exception when not installed on a client. To avoid this, make sure all API calls are spread inside functions that are only called when VNEI is present.
// global or local function
void UseVNEI() {
  RecipeInfo recipeInfo = new RecipeInfo();
}

// call it only when VNEI is present
if (BepInEx.Bootstrap.Chainloader.PluginInfos.ContainsKey("com.maxsch.valheim.vnei")) {
  UseVNEI();
}
This will prevent an error, when VNEI isn't installed.
At first world loading, VNEI indexes all available items and recipes at DungeonDB.Start to allow other mods to add their prefabs before.
You can hook events at Indexing to add custom items and recipes that were not collected by VNEI.
If these items/recipes use vanilla components instead of custom ones, feel free to open an issue or PR here.
The events are called with every GameObject (or Recipe) so it can be tried to get a certain component or name. The events are called in the following order:
Action<GameObject>
Indexing.AddItem(new Item(...)) to add a new itemAction<GameObject>
Indexing.DisableItem(name, context)Action<Recipe>
Action<GameObject>
Indexing.AddRecipeToItems with a new RecipeInfo.See OnIndexingItemRecipes as an example in:
Indexing.OnIndexingItemRecipes += (prefab) => {
    if (prefab.TryGetComponent(out CookingStation cookingStation)) {
        foreach (CookingStation.ItemConversion conversion in cookingStation.m_conversion) {
            RecipeInfo recipeInfo = new RecipeInfo();
            recipeInfo.SetStation(cookingStation, 1);
            recipeInfo.AddIngredient(conversion.m_from, Amount.One, Amount.One, 1, prefab.name);
            recipeInfo.AddResult(conversion.m_to, Amount.One, Amount.One, 1, prefab.name);
            Indexing.AddRecipeToItems(recipeInfo);
        }
    }
};
This gets every GameObject with a CookingStation component and adds the ItemConversions as a new RecipeInfo respectively.
With Indexing.AddRecipeToItems(recipeInfo) the corresponding items (conversion.m_from, conversion.m_to, cookingStation)
know the RecipeInfo and can show them in the UI.
Notice these items are ItemDrops/Pieces and therefore already registered as Items by VNEI.
If this is not the case with your prefabs, they have to be added at Indexing.OnIndexingItems.
You can use VNEI to open an item selection popup.
Action<string> onSelect = (prefabName) => {
    // called after selection
};
SelectUI selectUI = SelectUI.CreateSelection(parent, onSelect, Vector2.zero);
Type vnei_toggle_select_test inside the game console to open the example of VNEI/APIExample/SelectUITest.cs
0.3.0
0.2.3
0.2.2
0.2.1
0.2.0
0.1.0
0.0.4
0.0.3
0.0.2
0.0.1